How to Integrate Chatterbox TTS API with Open WebUI
Learn how to set up Chatterbox TTS API with Open WebUI to enable voice cloning and custom text-to-speech capabilities in your chat interface. This integration provides an OpenAI-compatible TTS solution that runs locally with your own voice samples.
Prerequisites
Before integrating with Open WebUI, ensure you have Chatterbox TTS API running:
- ✅ Chatterbox TTS API installed and running (Docker or local Python installation)
- ✅ API accessible at
http://localhost:4123(default) - ✅ Optional: Custom voices uploaded via the frontend at
http://localhost:4321
Customize available voices first by using the frontend at http://localhost:4321 to upload and manage your voice samples before configuring Open WebUI.
Step-by-Step Integration Guide
1. Access Open WebUI Admin Panel
- Log into your Open WebUI instance as an administrator
- Navigate to the Admin Panel
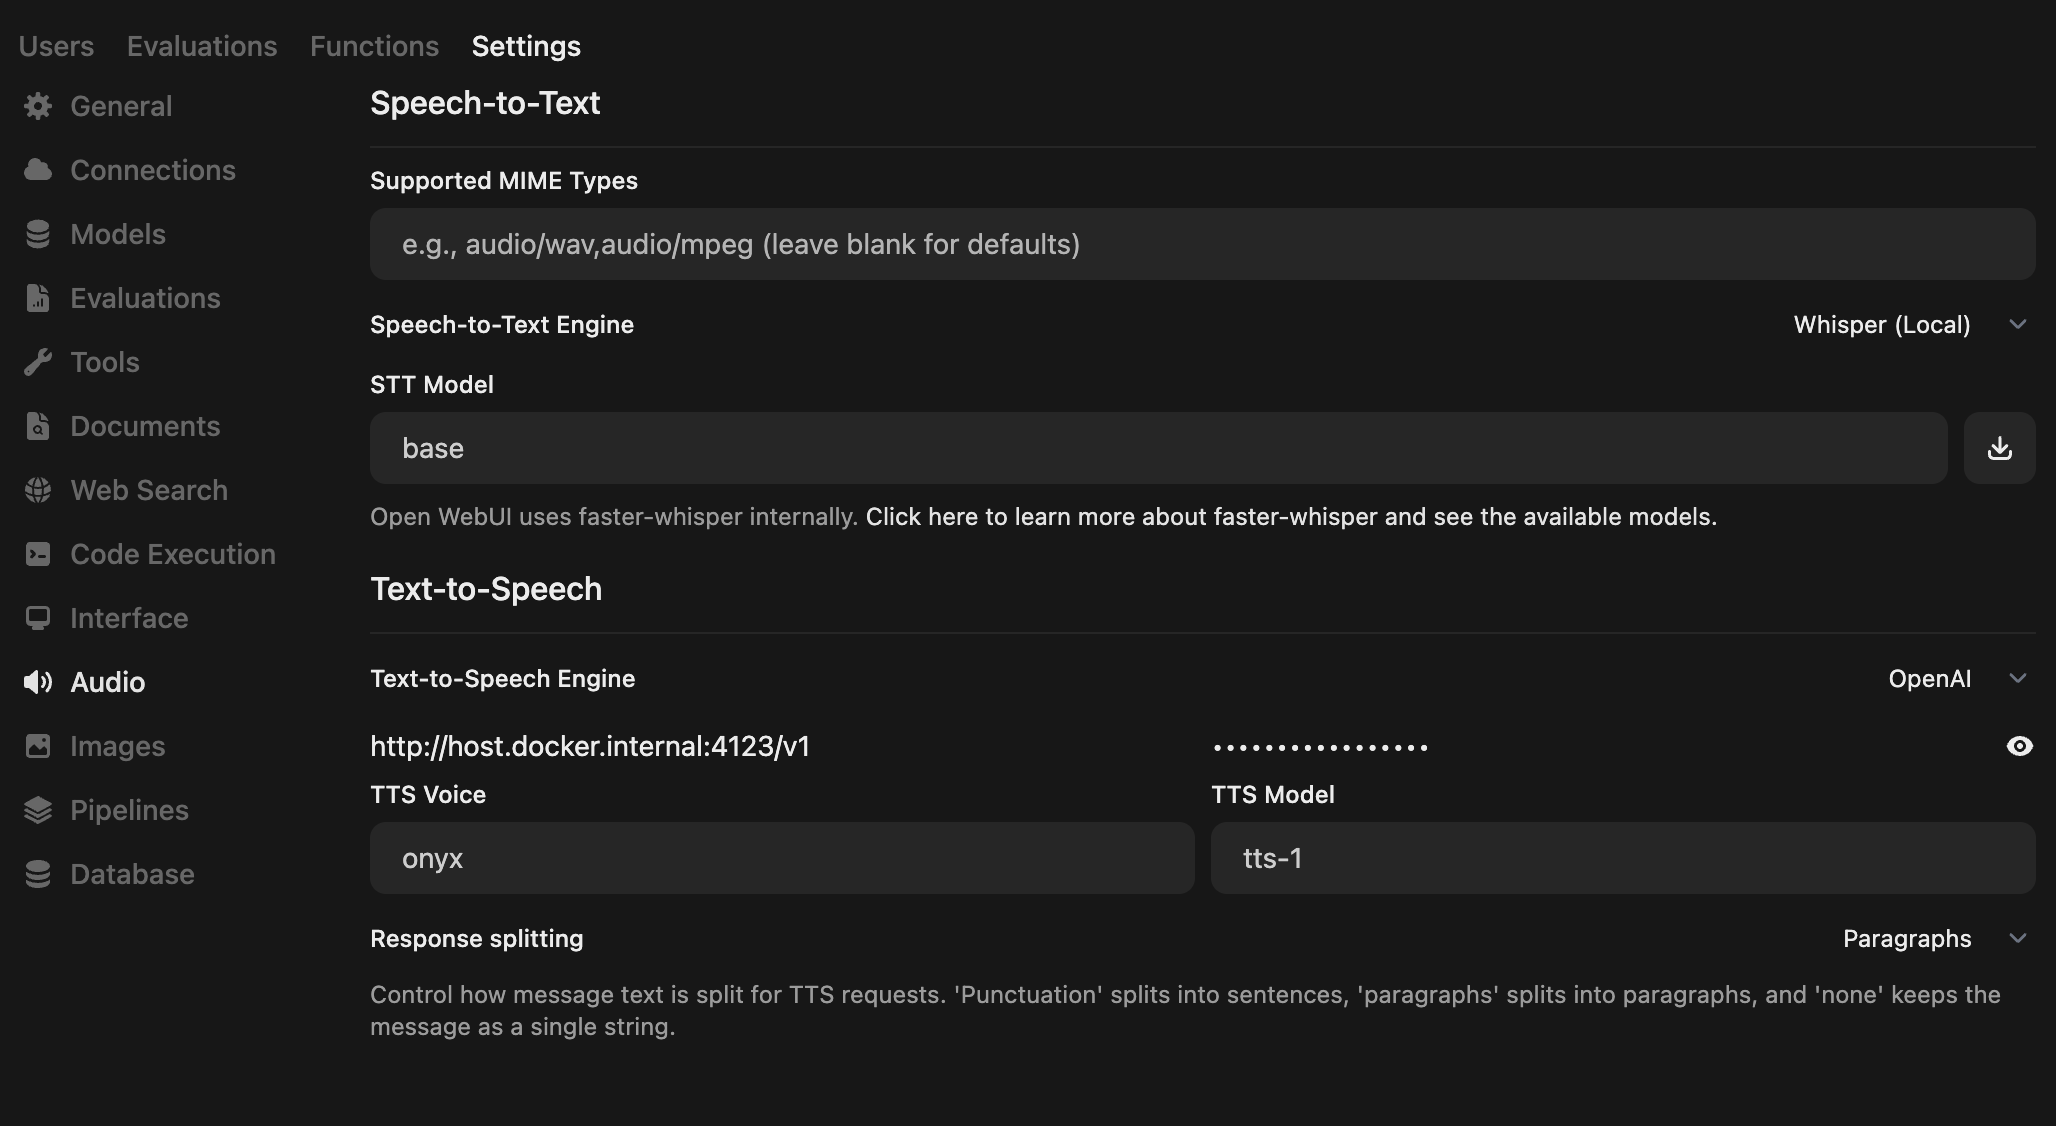
- Go to Settings → Audio
2. Configure TTS Settings
Set your Text-to-Speech Settings to match the following configuration:
| Setting | Value | Notes |
|---|---|---|
| Text-to-Speech Engine | OpenAI | Use OpenAI-compatible mode |
| API Base URL | http://localhost:4123/v1 | For Docker: try http://host.docker.internal:4123/v1 |
| API Key | none | No authentication required for local setup |
| TTS Model | tts-1 or tts-1-hd | Doesn't matter |
| TTS Voice | Your voice name | Name of the voice you've cloned (can include aliases) |
| Response splitting | Paragraphs | Recommended for better speech flow |
3. Test the Integration
- Save your settings in Open WebUI
- Navigate to a chat conversation
- Type a message and look for the speaker/audio icon to test TTS
- Verify that your custom voice is being used
Troubleshooting Common Issues
Connection Problems
Issue: Cannot connect to Chatterbox TTS API
- ✅ Verify Chatterbox TTS API is running: visit
http://localhost:4123/docs - ✅ For Docker setups, try using
http://host.docker.internal:4123/v1as the API Base URL - ✅ Check firewall settings and port accessibility
Voice Not Found
Issue: Selected voice is not available
- ✅ Ensure voice is uploaded via the frontend at
http://localhost:4321 - ✅ Check voice name spelling
- ✅ Try using a voice alias if configured
Advanced Configuration
Docker Network Setup
If running both Open WebUI and Chatterbox TTS API in Docker:
# docker-compose.yml example
services:
  chatterbox-tts:
    # ... your chatterbox configuration
    networks:
      - webui-network

  open-webui:
    # ... your open-webui configuration
    networks:
      - webui-network
    environment:
      # Use service name as hostname
      - TTS_API_URL=http://chatterbox-tts:4123/v1

networks:
  webui-network:
    driver: bridge
Environment Variables Configuration
For advanced users, you can configure Chatterbox TTS API using environment variables:
# Performance settings
CHATTERBOX_MAX_WORKERS=4
CHATTERBOX_TIMEOUT=30

# Audio quality settings
CHATTERBOX_SAMPLE_RATE=22050
CHATTERBOX_AUDIO_FORMAT=wav

# Memory management
CHATTERBOX_MAX_MEMORY_MB=2048
CHATTERBOX_CLEANUP_INTERVAL=300
Custom Voice Management
To get the most out of your integration:
- Upload high-quality voice samples (clear, 10-30 seconds)
- Use descriptive voice names for easy identification in Open WebUI
- Set up voice aliases in the Chatterbox frontend for convenience
- Test different voices to find the best match for your use case
Alternative Setup Methods
Remote Server Setup
For remote Chatterbox TTS API installations:
# API Base URL format:
http://your-server-ip:4123/v1
# or
https://your-domain.com/v1
Related Resources
- 📖 Official Open WebUI Integration Guide - Complete tutorial on the Open WebUI documentation
- 🚀 Chatterbox TTS API Documentation - Full API reference and setup guide
- 🎭 Voice Cloning Guide - Learn how to create custom voice models
- 🐳 Docker Setup Guide - Container deployment instructions
Support and Community
Need help with your integration?
- 🐛 Issues: Report bugs on GitHub
- 💬 Discord: Join the community Discord for real-time support
- 📚 Documentation: Browse the complete API documentation
Next Steps: Once you have the integration working, explore advanced TTS features like real-time streaming, parameter control, and voice library management.